
Every artist has a different starting point. Some of us begin with paints and never let go, some with clay, some with ink, and some with chalk. But what we all have in common is that at some point in our lives, we’ve all held a pencil and made a sketch or a drawing with it.
While that doesn’t make us expert graphite artists, it’s clear that graphite is the medium that connects these diverse beginnings, proving to be a fundamental tool that every artist can use.
Graphite is also one of the most accessible mediums, making art possible for pretty much everyone, and it’s forgiving nature encourages learning from mistakes, and fosters the development at a very small cost.
In this guide we’re going to delve into all you need to know about drawing with graphite, from the basic concepts to the most advanced techniques, all in a well-structured, comprehensible collection. Let’s get started!
What is Graphite
Graphite is a form of carbon that is naturally found in the earth. It’s composed of layers of carbon atoms arranged in a hexagonal structure, which gives it its characteristic shiny, slippery feel. This structure allows graphite to leave marks on paper easily, making it one of the best mediums for drawing.
Types of Graphite
While graphite is the same altogether, it can be mixed with clay, charcoal, etc and shaped in different forms, which include graphite pencils, sticks and powdered graphite.
Graphite Pencils
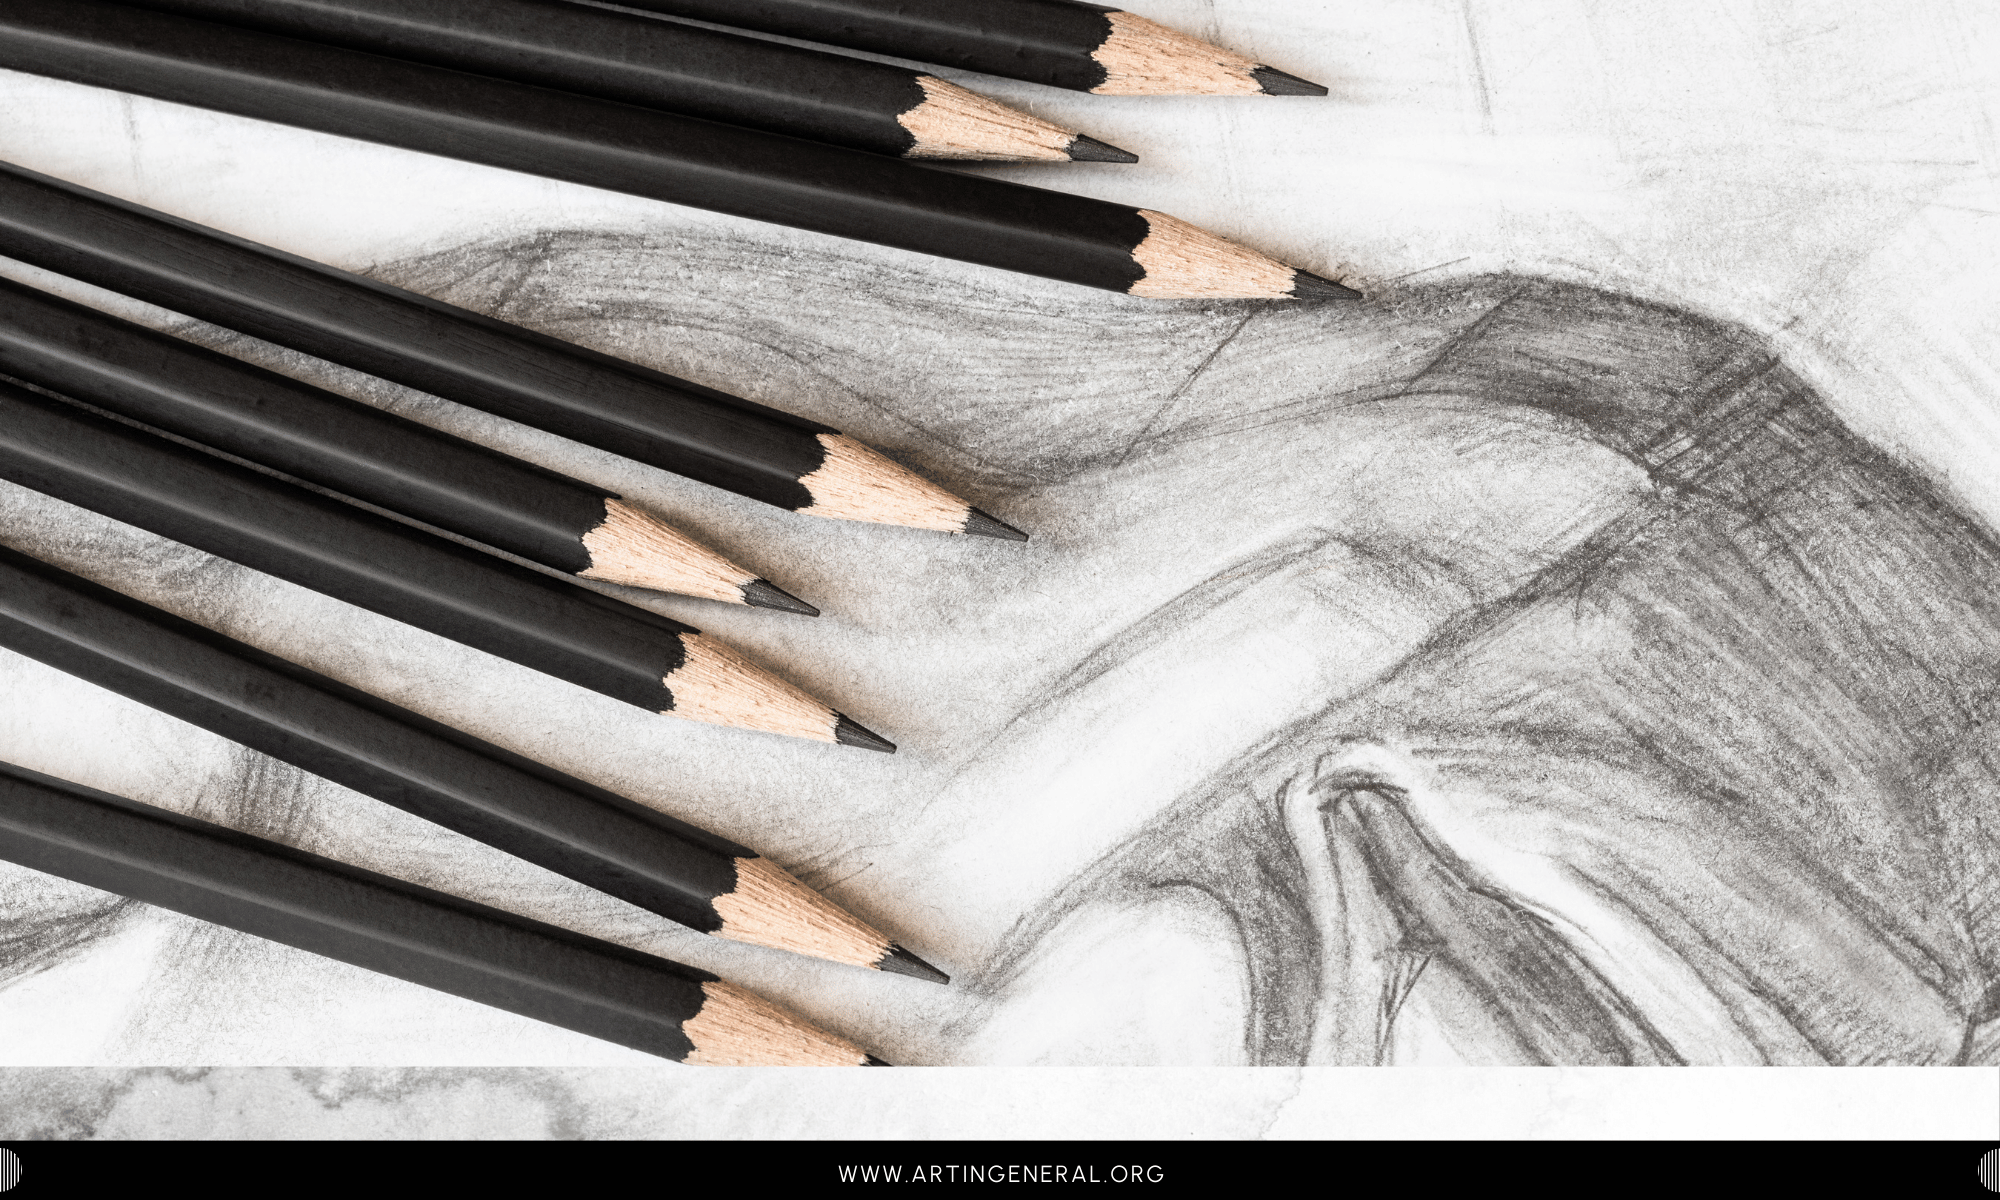
Graphite Pencils are the most common form of graphite used for writing, sketching and drawing. They are very easy to use, erase and can produce a variety of values when drawing, making them one of the most used art supplies all over the world.
They are made of graphite cores encased in wood, and come in various grades depending on the graphite-clay ratio. The graphite cores are mixed with clay to enhance the hardness of the pencil. If the mix contains more graphite the lines you get will be darker and feel softer on the paper, while if it contains more clay, they’ll appear lighter and feel harder on the paper. 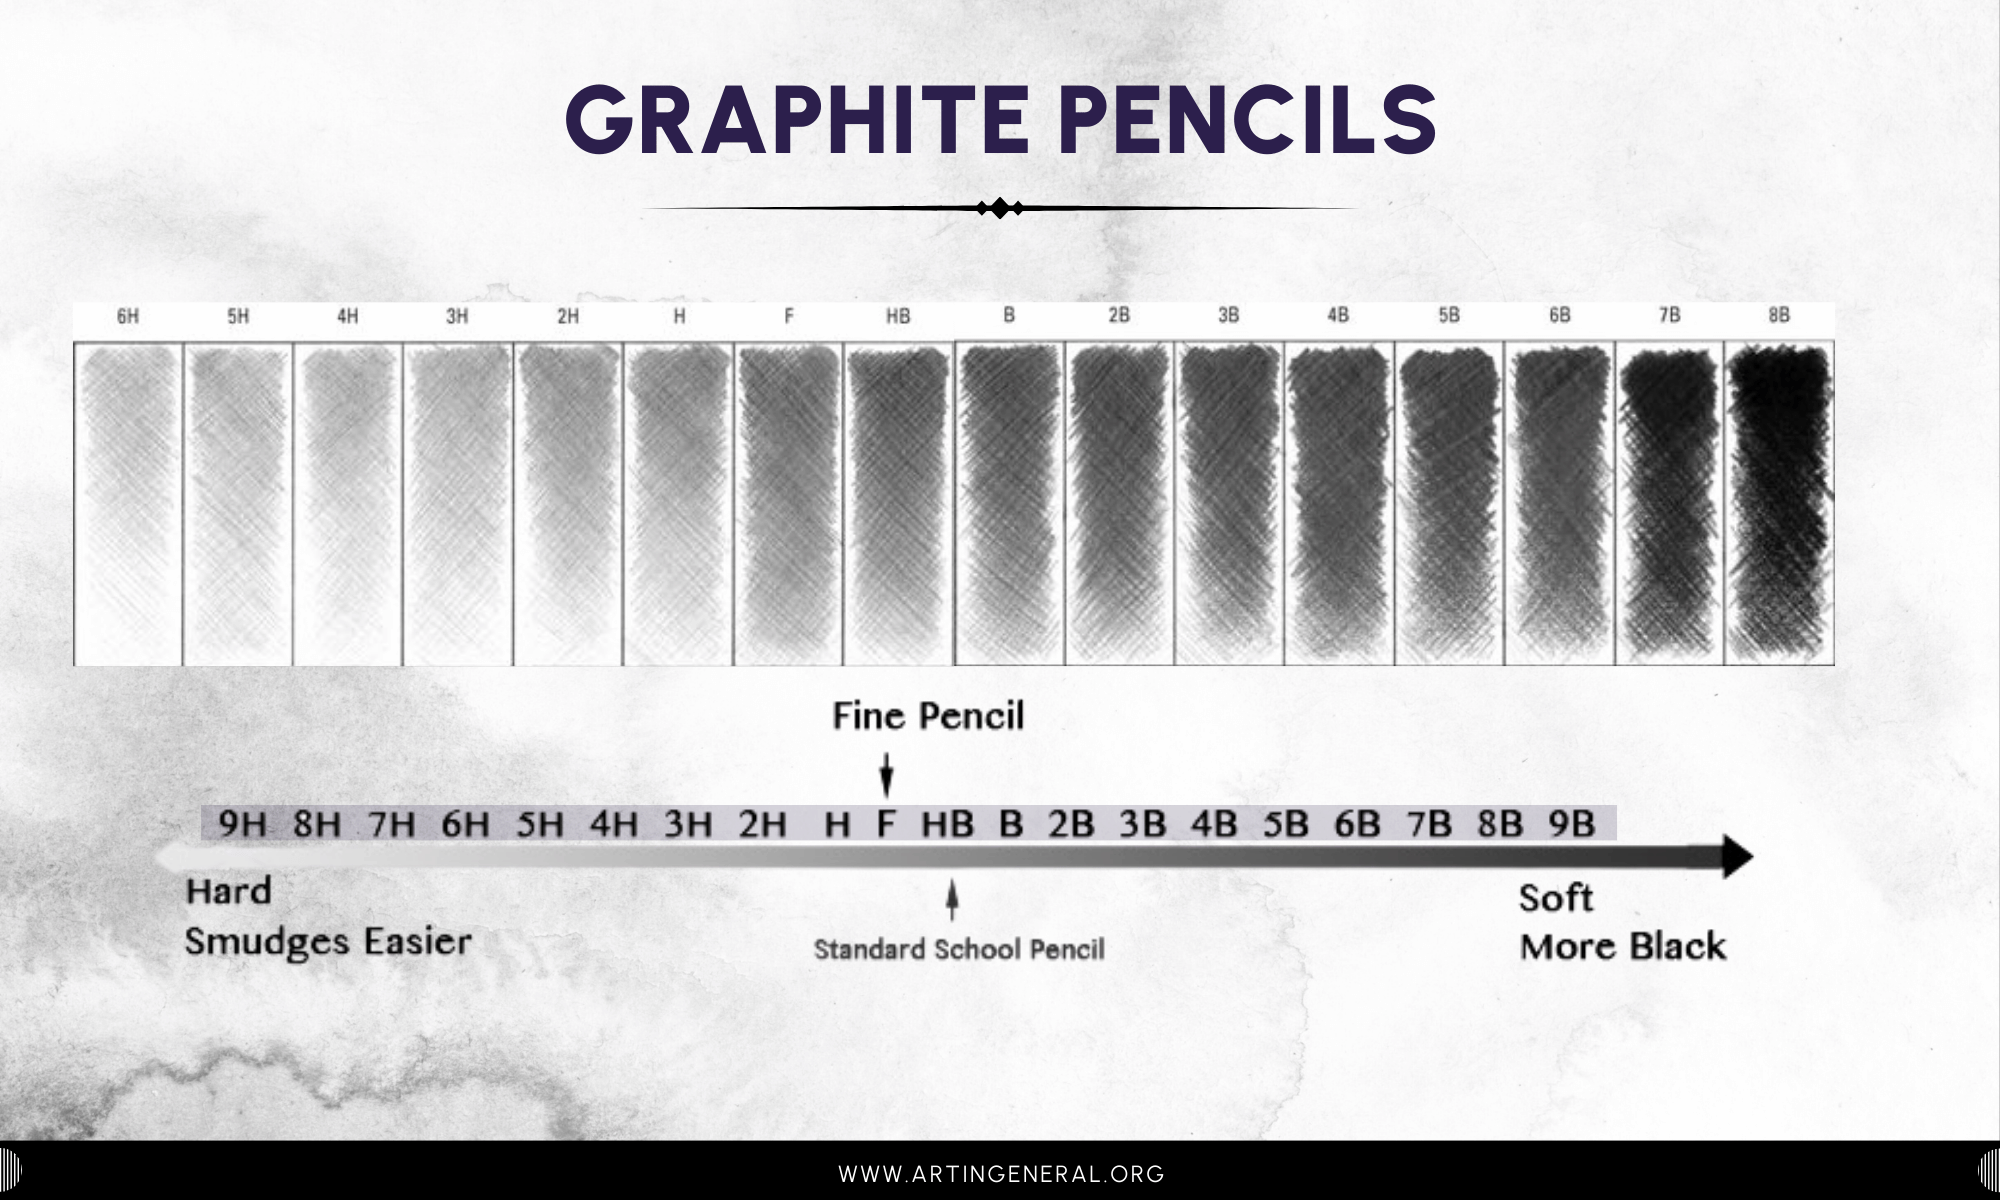
Graphite pencils usually come labeled with letters and numbers, which indicate the softness and hardness of the graphite core.
- Pencils Marked with an “H” are hard, the higher the number besides, the lighter and finer lines the pencil will produce.
- Pencils marked with a “B” are soft, the higher the number besides,the darker the lines the pencil will produce.
- “HB” Pencils lie exactly in the middle, balancing perfectly harness and blackness, and while “F” Pencils are similar to them, they are slightly more on the harder side and can be sharpened to a finer point.
This is known as the Pencil Grading Scale, let’s have a more in-depth look:
- 9H to H: These pencils are the hardest and produce very light lines. They are often used for technical drawing and fine details.
- HB and F: These are middle-grade pencils used for general writing and drawing.
- B to 9B: These pencils are progressively softer and produce darker lines. They are favored by artists for shading and creating bold, expressive lines.
Hybrid Pencils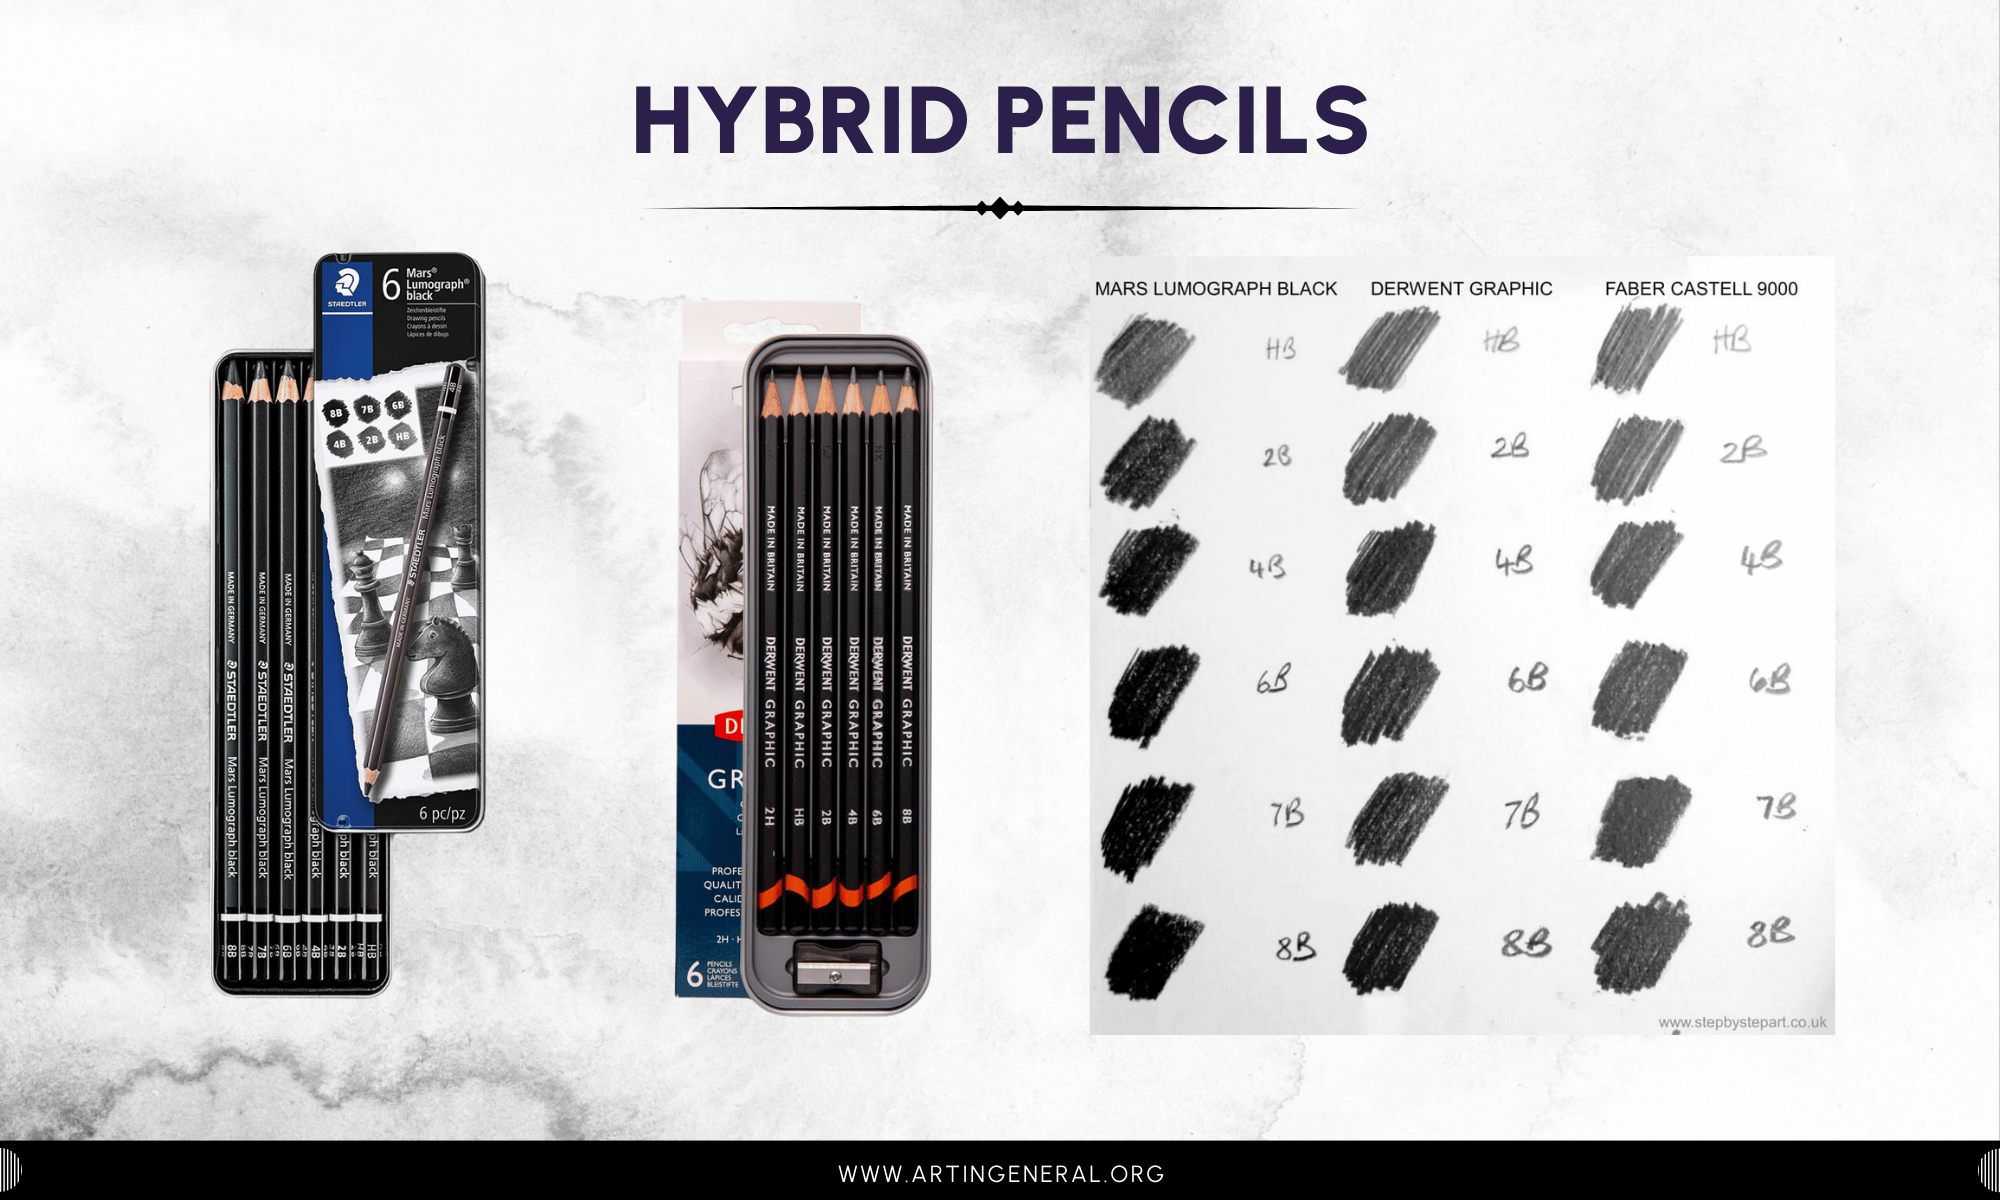
Graphite is a shiny element, which makes it almost impossible to achieve a complete value range, especially when talking about the darkest values. Artists have used different mediums like gouache and charcoal to achieve the full value range, without much success as it’s quite complex to mix mediums without the right experience. This has made art supplies companies come up with hybrid pencils that contain carbon mixed with graphite, reducing the natural graphite shine and darkening the core much more. Brands like Stardtler, Conte a Paris and Koh-i-Noor are known for making these kinds of pencils.
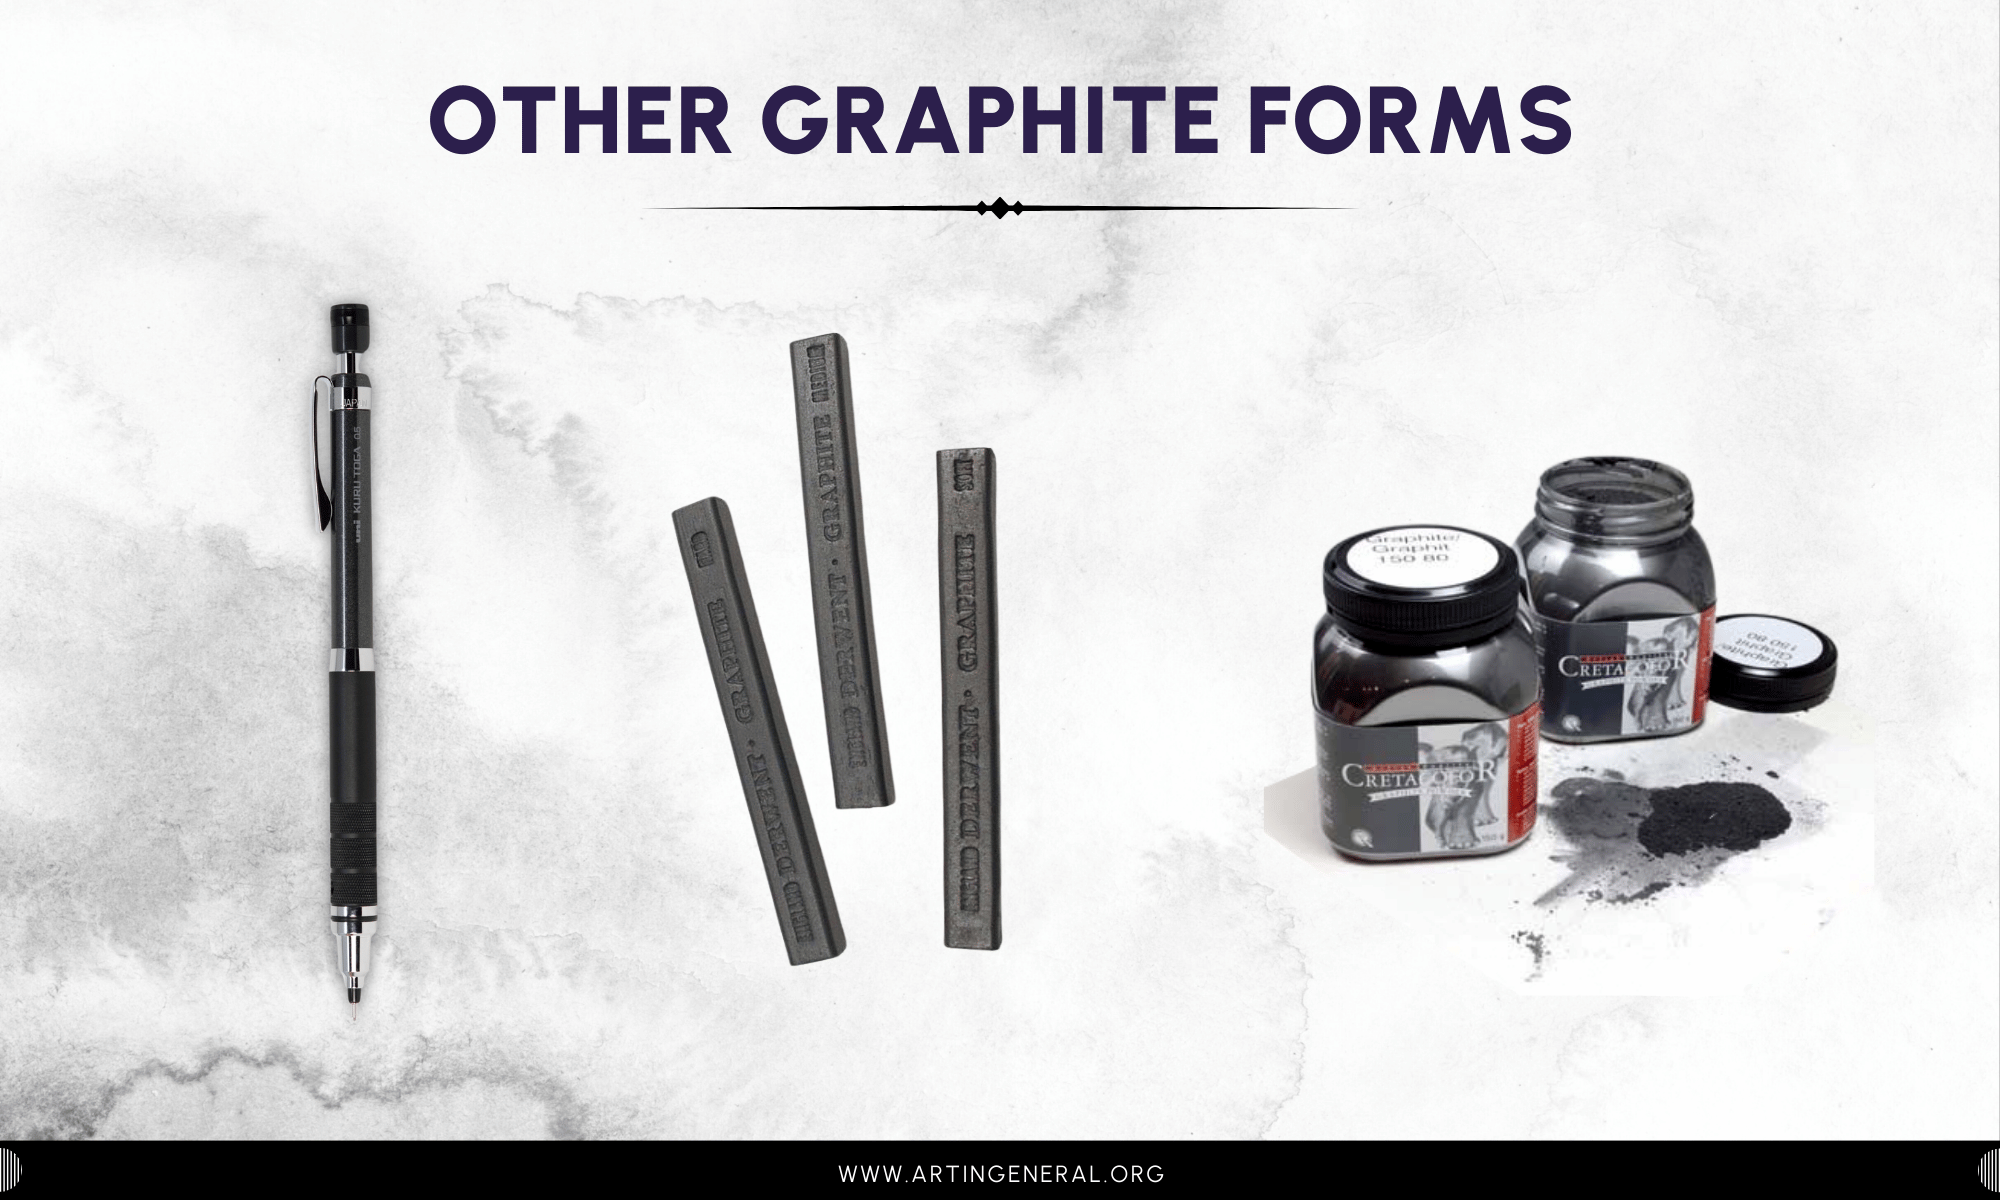
Mechanical Pencils
Mechanical Pencils are drawing and writing tools that have a plastic or metallic body which holds a replaceable and refillable graphite lead. The graphite leads are quite slim, and come in various diameters (e.g., 0.3mm, 0.5mm, 0.7mm, 2mm) and hardness grades (e.g., HB, 2B, 2H).
The mechanism inside the pencil makes the lead advance incrementally, either by clicking a button, twisting the barrel or shaking the pencil.
Mechanical pencils were made to offer a more convenient approach for writing and drawing, taking away the need of constant sharpening; they also offer a consistent line width, which is crucial for technical drawing, sketching and precise work. The different lead grade availability make them very convenient as several leads fit into a small case and can be used on the same pencil body, which is much more convenient and portable than carrying a full pencil set.
Graphite Sticks
Graphite sticks are solid pieces of graphite that are used for drawing, while they are similar to graphite pencils, they don’t have a wood casing so they can be used directly onto the paper. They are great for expressive drawing, gesture, and covering large areas quickly.
Powdered Graphite
As its name indicates, powdered graphite is fine graphite powder that can be applied with brushes or your fingers. This form of graphite is very useful to get smooth and even shading, and it works wonders in large areas where you want uniformity. When used properly it’s also great for achieving very dark tones, and white you can purchase it ready, you can make your own by sanding graphite sticks if you need only small amounts.
Graphite Essentials
In order to start drawing with graphite you’re going to need different supplies, let’s go over some of them to make sure you have all you need.
Graphite Pencils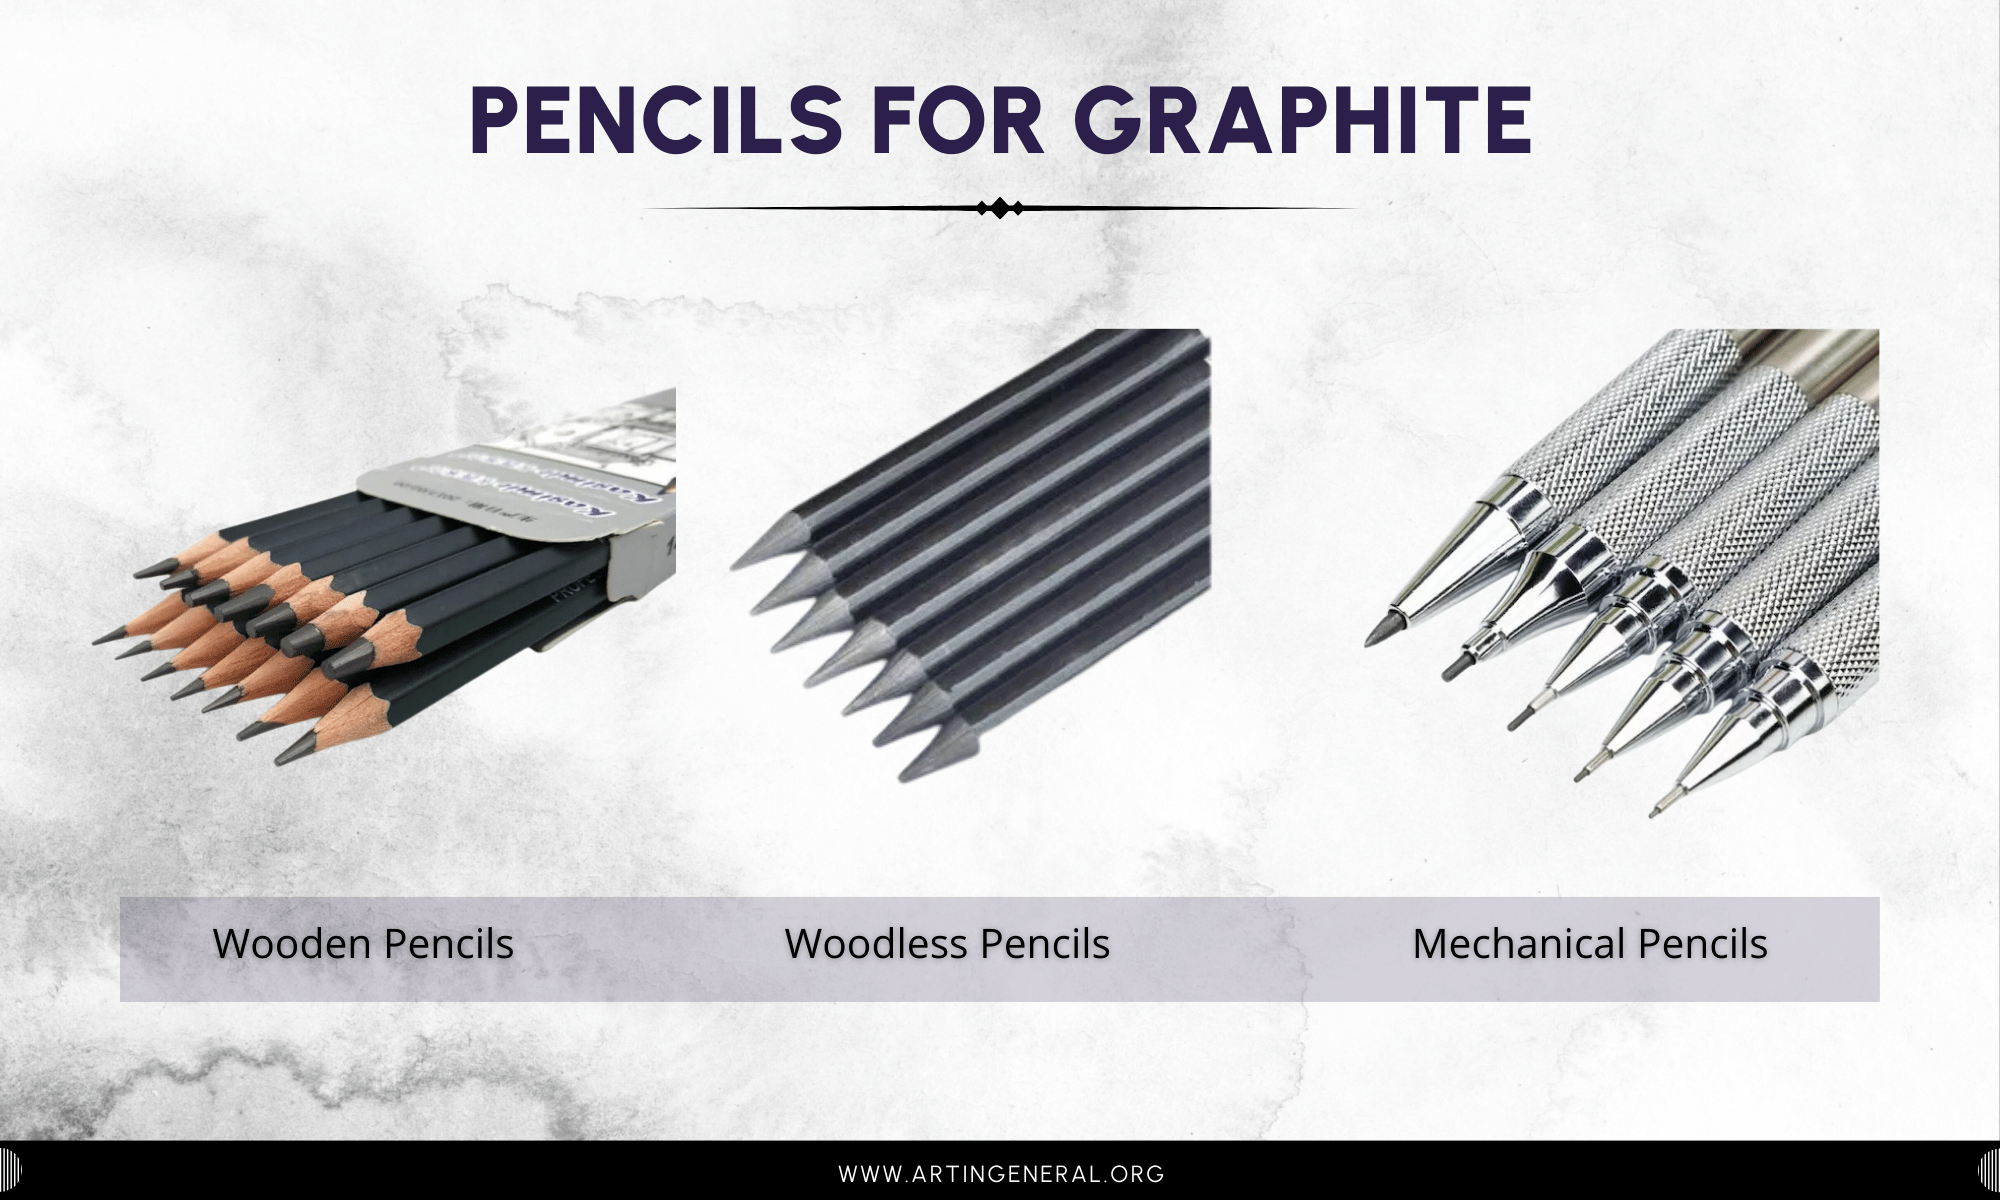
Graphite pencils are a must, however you don’t need every single pencil on the graphite scale, especially if you’re just starting. Graphite pencils are quite affordable, and while professional options are slightly pricier than the average #2 pencils, the price difference won’t break the bank.
- For Sketching you’ll only need an HB Pencil, perfect hardness and blackness balance for simple sketches, easy to erase and widely available.
- For Shading you’ll need 2B and 4B Pencils, if you can, get a 6B pencil too. It will be a good addition to your toolkit.
- For more advanced techniques like Burnishing and for Technical Drawing you’ll need HB, 2H and 4H Pencils.
Brands like Faber Castell, Staedtler Mars Lumograph, and Derwent are renowned for their high, consistent quality, good range of graphite pencils, and a great option for beginners as well as professional artists.
Paper for Graphite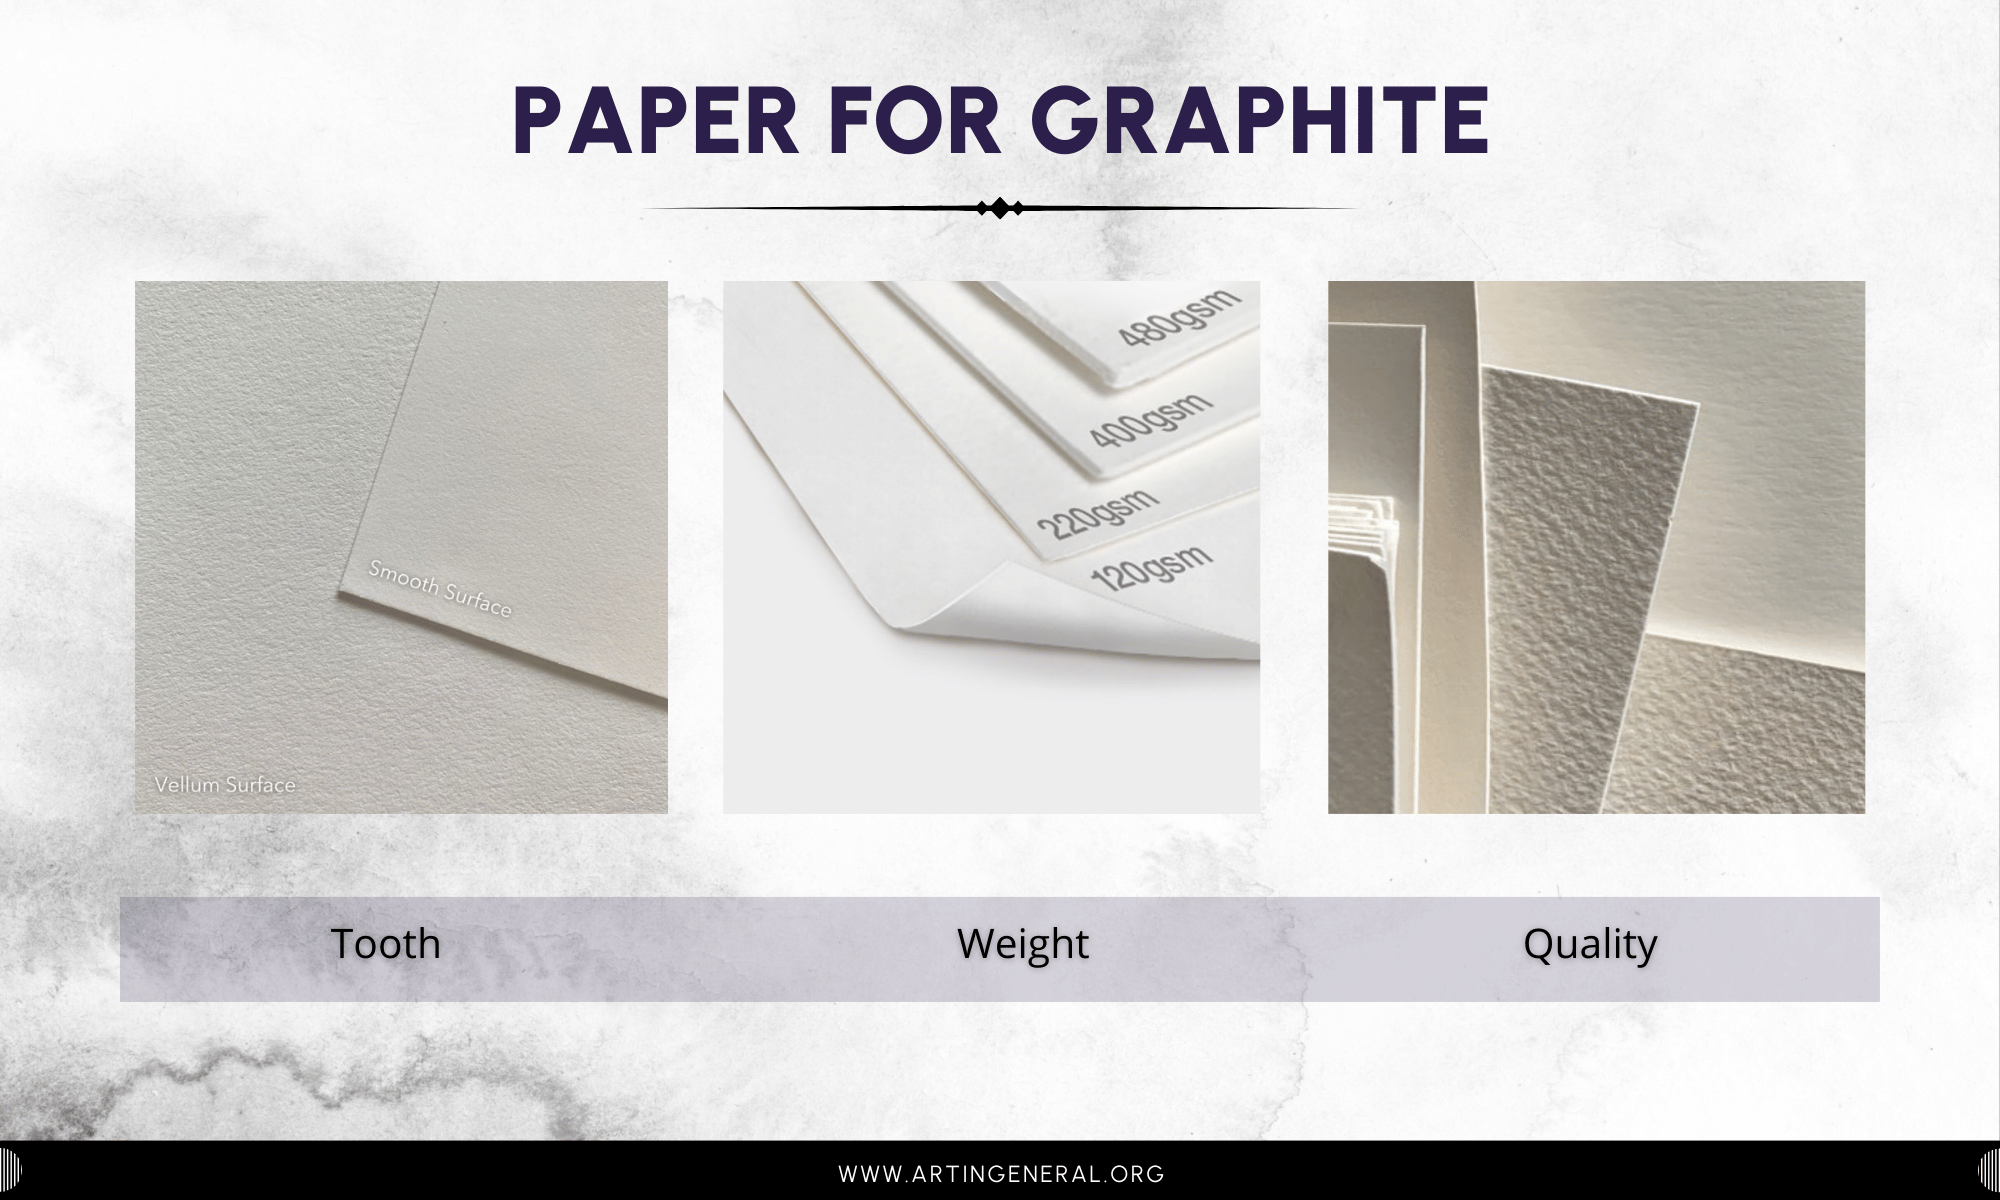
Paper matters, always have and always will, that’s why choosing the right paper can play a key role in the overall experience and result of your work.
When looking for paper for graphite drawing, you have to take into consideration three key points: Tooth, Weight, and Quality.
Tooth
Tooth refers to the texture of the paper, more specifically to the small spaces formed between the bumps and grooves on its surface. These spaces hold the graphite (or pigment in case of other art materials) and allows for a better application, blending and shading.
- Smooth Paper is good for fine lines, detailed work and technical drawing. Bristol Board and Hot Pressed watercolor paper are great examples of smooth paper. Hot Pressed Paper is the best for Professional Work.
- Velour Paper is a slightly textured paper that is not as smooth as Bristol Board, having just as enough texture to hold graphite down well. This is the best paper for both graphite sketches and professional work.
- Medium Paper offers a more balanced texture that works well to add character to your art, however it is harder to work on details as the pencil bumps constantly on the irregularities of the paper.
Weight
Weight refers to the weight of the paper per unit of measurement, in the case of pounds, it’s pounds per 500 sheets of paper (a ream), so a “90 lb paper” means a ream of paper weighs 90 pounds. In the case of grams, it’s grams per square meter, so a “190 gsm paper” means one square meter of the paper weighs 190 grams.
- Heavier papers (usually 90 lb/190 gsm or higher) are more durable and can handle multiple layers of graphite, erasing, and blending without tearing or warping.
- Lighter papers are generally used for quick sketches or practice and are not suitable for finished pieces.
Quality
While the tooth and weight of the paper are key characteristics of the paper’s quality, the material of the paper and whether it’s acid-free or not is what determines its quality. Acid-free paper will not deteriorate nor yellow over time, maintaining the graphite on it for a longer time. 100% cotton paper is also more durable, will take graphite better as well as other shading techniques, and it’s much more forgiving than cellulose paper, however it’s also much more expensive so it should be used sparingly.
Arches Hot Pressed Watercolor Paper, Strathmore Pastel Paper, Canson Drawing Paper, Strathmore Bristol Board and Fabriano Artistico are good choices for graphite for both beginners and professionals.
Blending Tools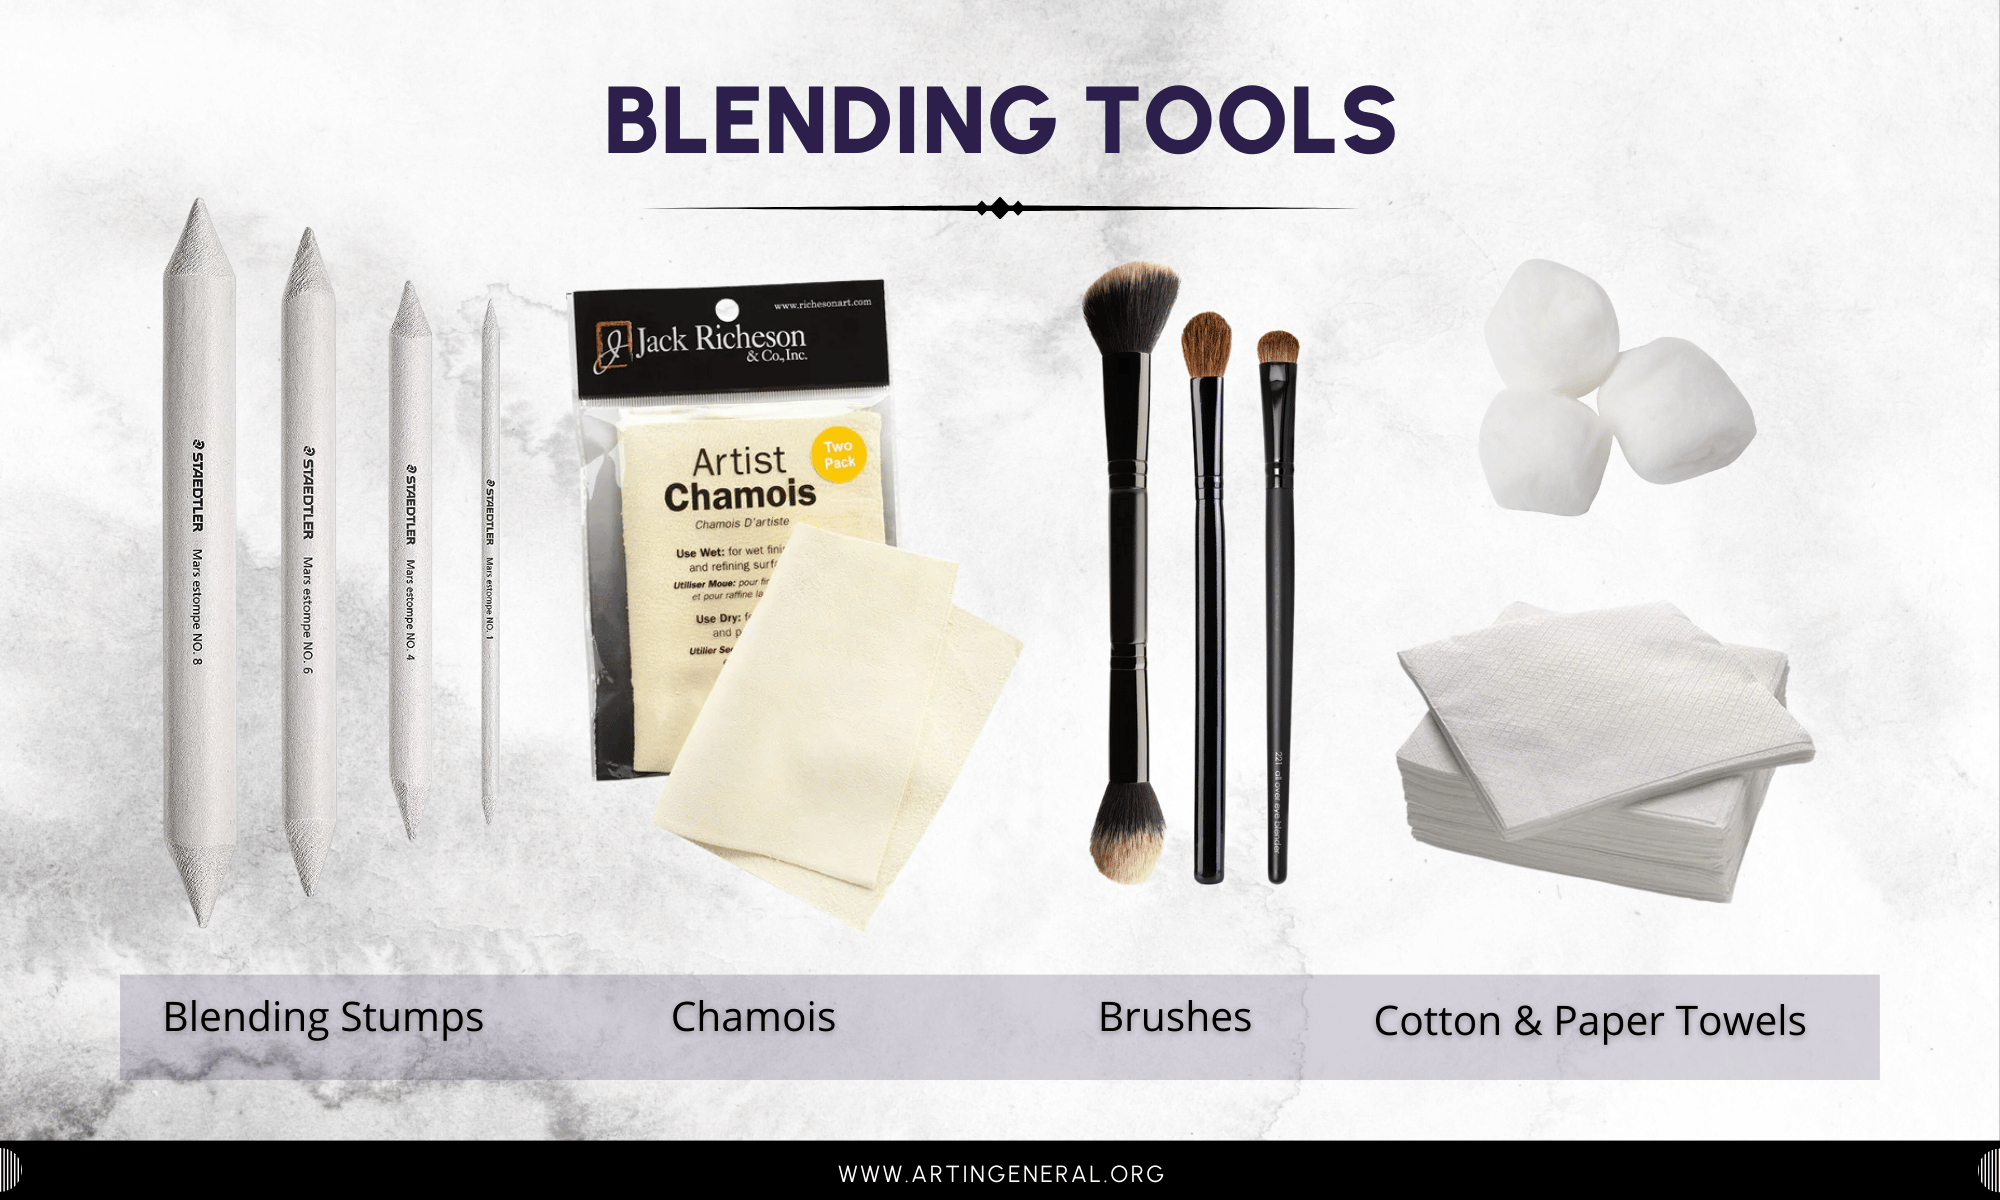
While at the beginning most artists use paper towels or their fingers for blending, they are not the best options for creating smooth transitions and gradients, which are very important for graphite drawing. Let’s go over a few of them:
- Blending Stumps and Tortillons: Blending stumps are rolls of paper with two points used for blending graphite, while tortillons only have one larger, finer point. Blending stumps are great for large areas and smooth transitions, while tortillons are better for smaller areas and details as they can remain pointy for longer.
- Chamois: Chamois are soft leather cloths that are used for softening large areas of graphite and for blending.
- Brushes: Soft brushes are used to uniformly spread and blend graphite and to remove excess of graphite dust. They’re also great for working with ordered graphite and for subtle graphite layering.
- Cotton and Paper Towels: Cotton and paper towels are useful for blending and smoothing graphite over large areas. They can create soft gradients and transitions by gently rubbing the graphite on the paper.
- Other Pencils: You can use other pencils as blending tools as long as they’re of a smaller grade, they will do an excellent job filling on the white of the paper, but will require more control than other blending tools.
Erasers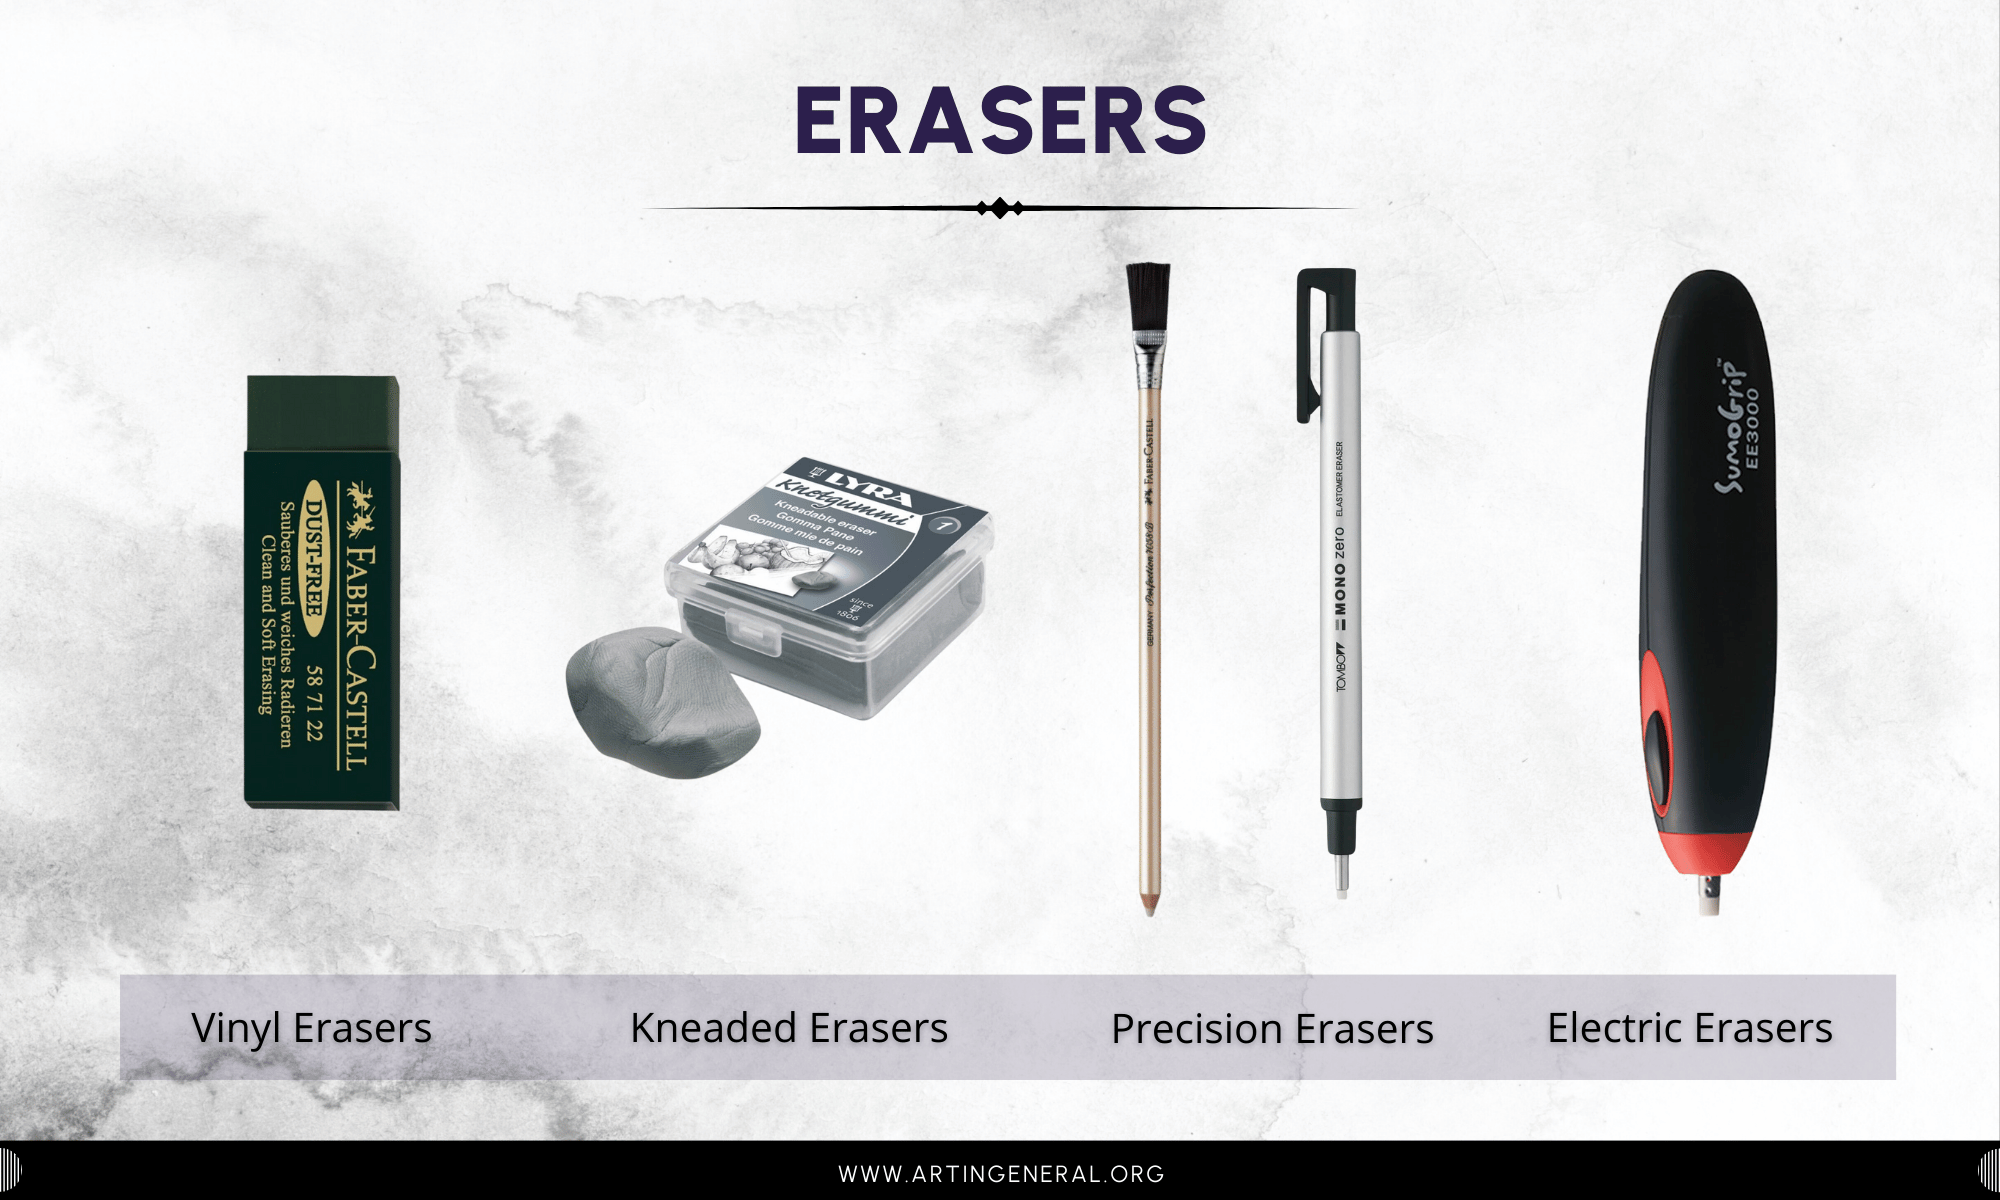
Erasers are not only used to correct mistakes, in graphite drawing they are used for adding highlights, working on details, softening graphite layers and even for blending in some cases. Let’s go over some of the erasers you might use while working with graphite.
- Vinyl Erasers: These erasers are what we know as “hard erasers”, they provide a strong, clean erasing line. They remove a lot of graphite and don’t leave a lot of dust. They are usually white, green or blue. Don’t stain the paper and are excellent for creating strong highlights but if overused might damage your paper.
- Kneaded Erasers: These are soft, malleable erasers that can be molded into different shapes, they are very soft and can be used to lighten areas, work on small highlights and refining details. As they get used and fill up with graphite, they can be used almost as a chamoy and be a good blending tool for realistic drawing.
- Precision Erasers: Vinyl erasers can be cut and shaped into smaller erasers to work on details however smaller, thinner erasers are also sold. Brands like Tombow have erasers like the Mono Zero and we also have the pencil erasers that work wonders for details.
- Electric Erasers: Electric Erasers are great for creating very precise details and working on stubborn areas, we recommend only going for brand-name ones, since they are the only ones that guarantee quality and precision. While they’re a nice addition to your toolkit, they’re not a must and they can be very hard to control for beginners due to their constant buzzing.
Pencil Sharpeners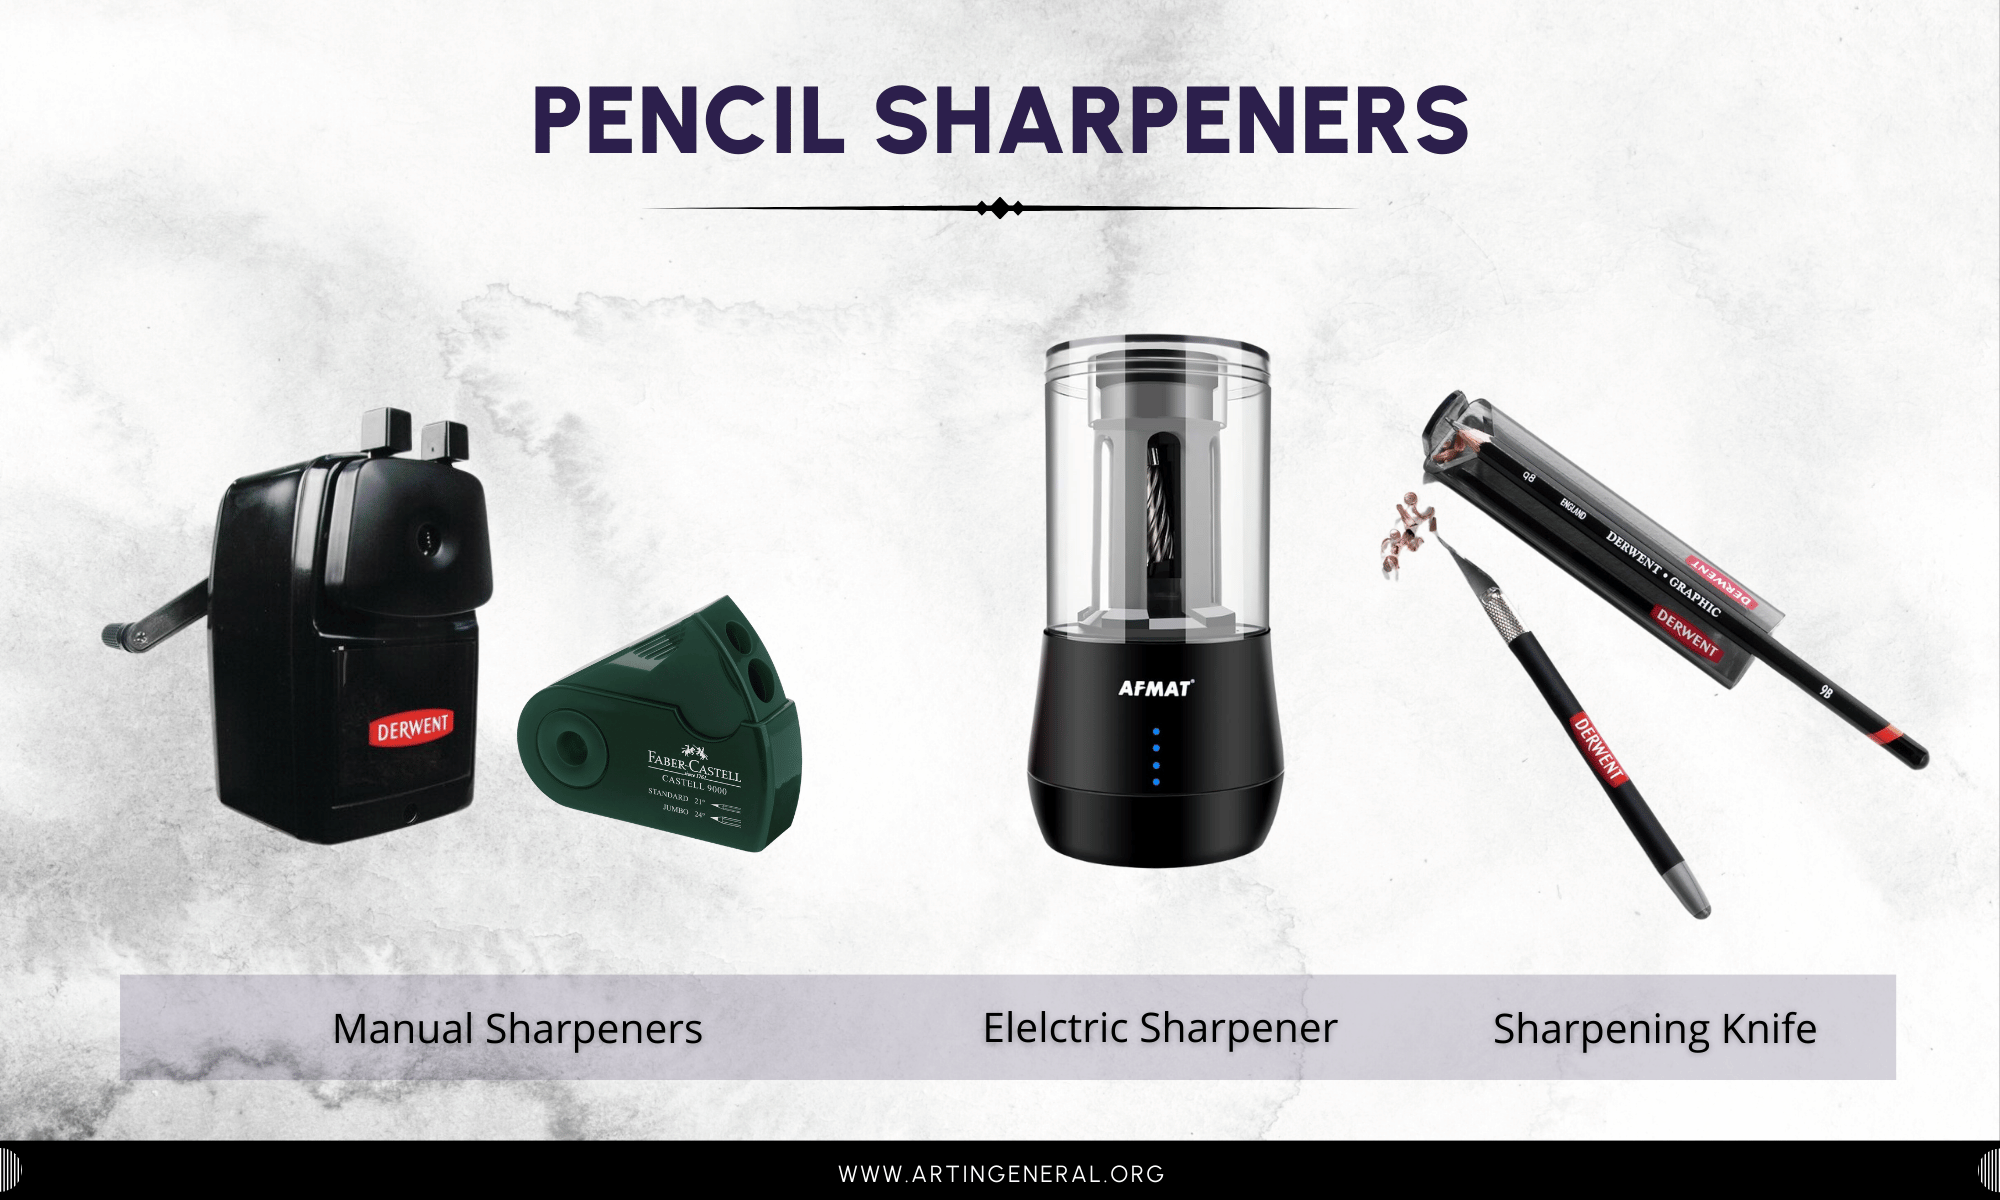
Pencil sharpeners are crucial to keep a point tip, and while they might not seem that much on the early stages of your journey, you’ll come to appreciate them and learn to work with them.
- Manual Sharpener: We have the usual sharpeners that are simple, portable and easy to use. Brands like Staedtler and Faber Castell make very good sharpeners.
- Electric Sharpener: We also have the electric ones, they’re great, fast and very efficient, and can provide a quick, consistent point. X-Acto and Bostitch are great brands to look into.
- Sharpening Knives: While using sharpeners is very practical and straightforward, we recommend you get acquainted with sharpening your pencils with a knife. This way you’ll be able to get the most out of your pencils by controlling the shape and length of the exposed lead, allowing for both fine detail work and broader strokes which will come in handy as you grow as a graphite artist.
Other Supplies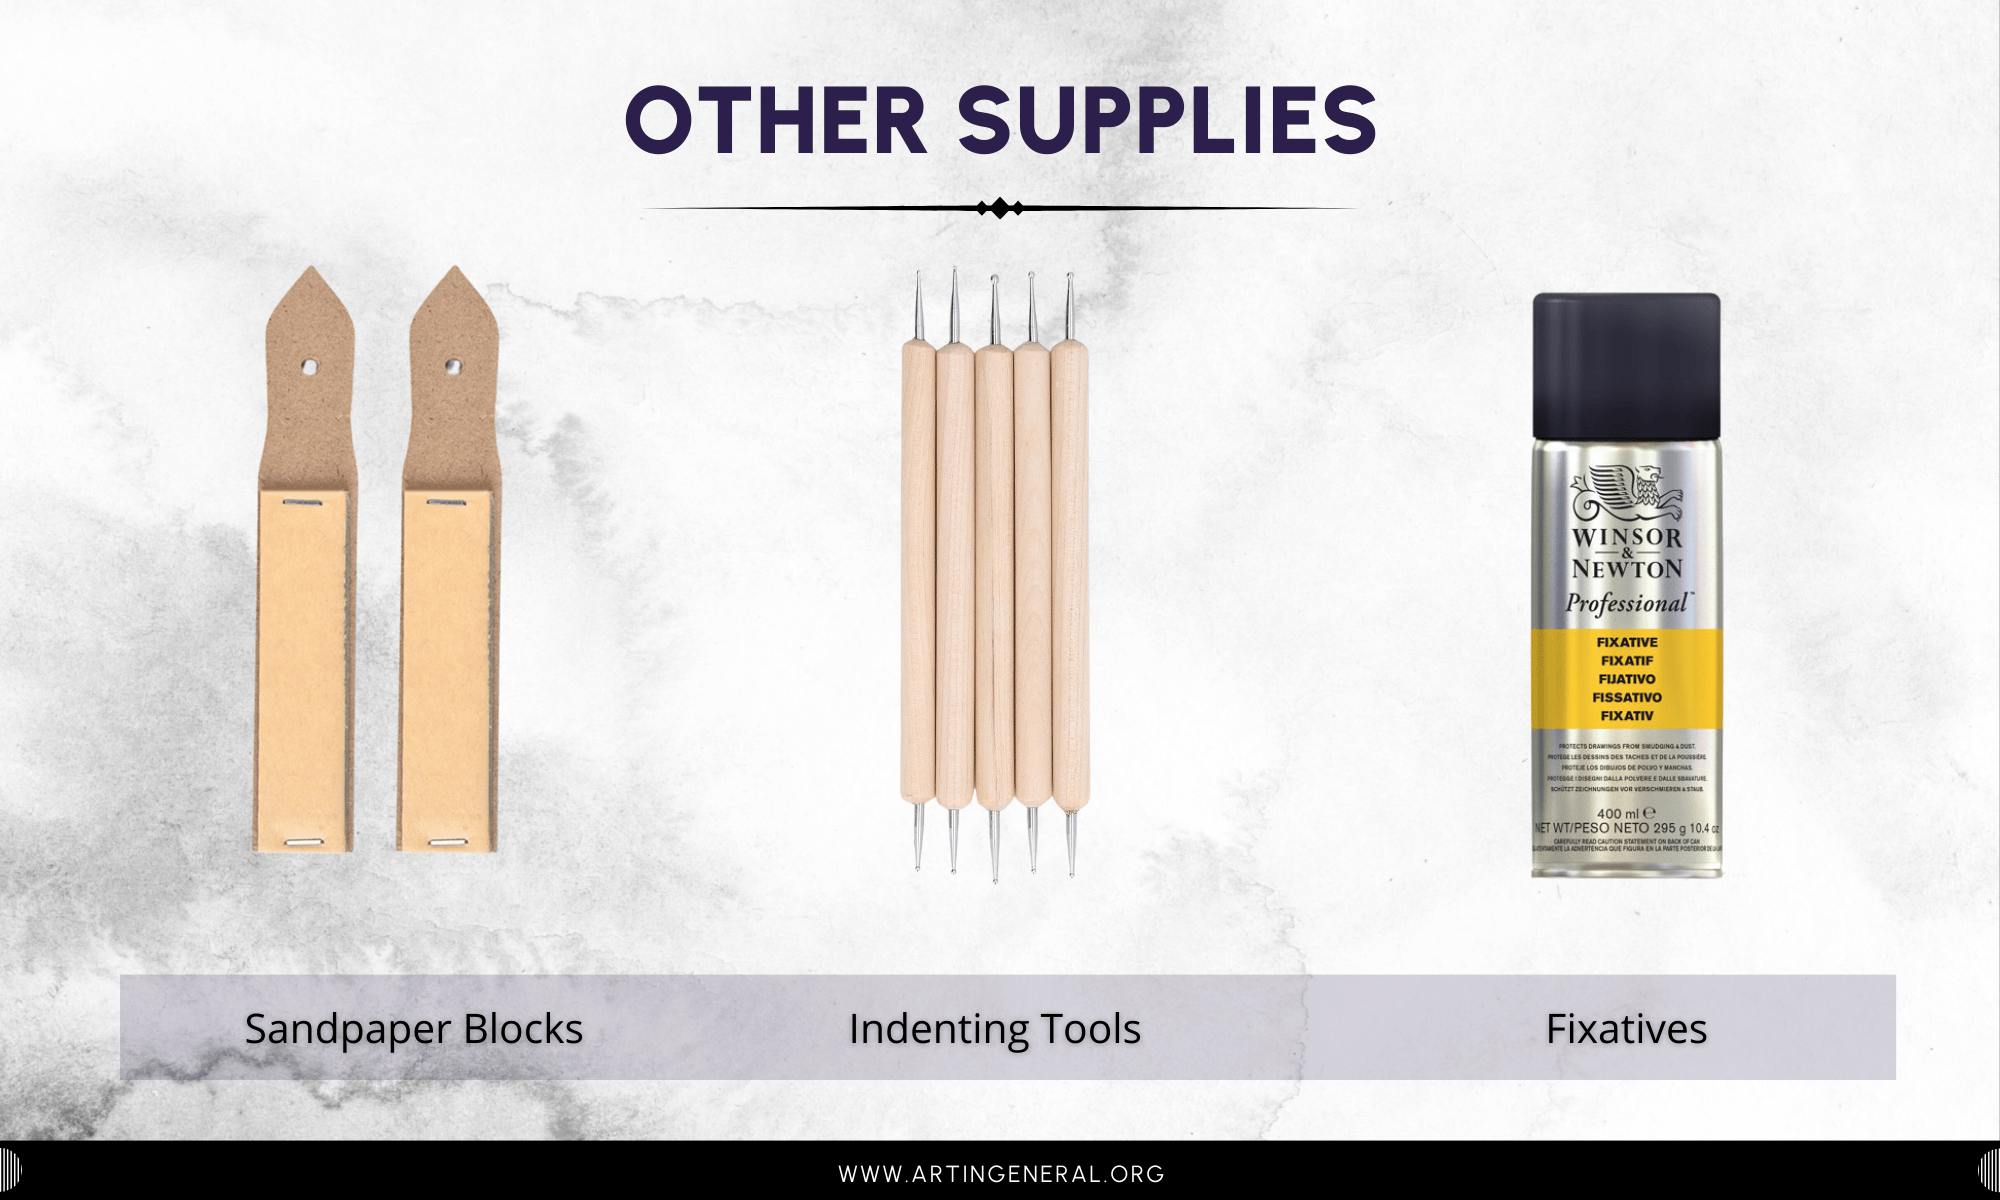
- Sandpaper Blocks: Sandpaper blocks are used to sharpen and shape graphite pencils, they help you get a very fine point or a customized edge. They are also great for cleaning your blending stumps so we recommend having a couple around.
- Indenting Tools: Indenting tools as their name indicates, create indentations on the paper that the pencil isn’t able to reach, thus creating white lines or highlights in the final drawing. Excellent for fur or hair strands.
- Fixatives: Fixatives are sprays used to protect your finished work from further smudging, fading or damage. It increases the lifespan of the artwork by protecting it from environmental factors such as light, dust, and moisture.
And that’s all you could possibly need to start drawing with graphite, from the start of your work to the finishing touches and protective coating of it. It’s quite a lot but the price point is nothing compared to other mediums. Makes sure to check our essentials supplies buying guide “Best Pencils for Drawing” and “Best Graphite Drawing Supplies” to get the most out of your money and get top quality, fully reviewed products.
That was all for this guide, we hope this was useful to you and check our next post for drawing and shading techniques for beginner, intermediate and professional artists. Until next time!
Leave a Reply